 by
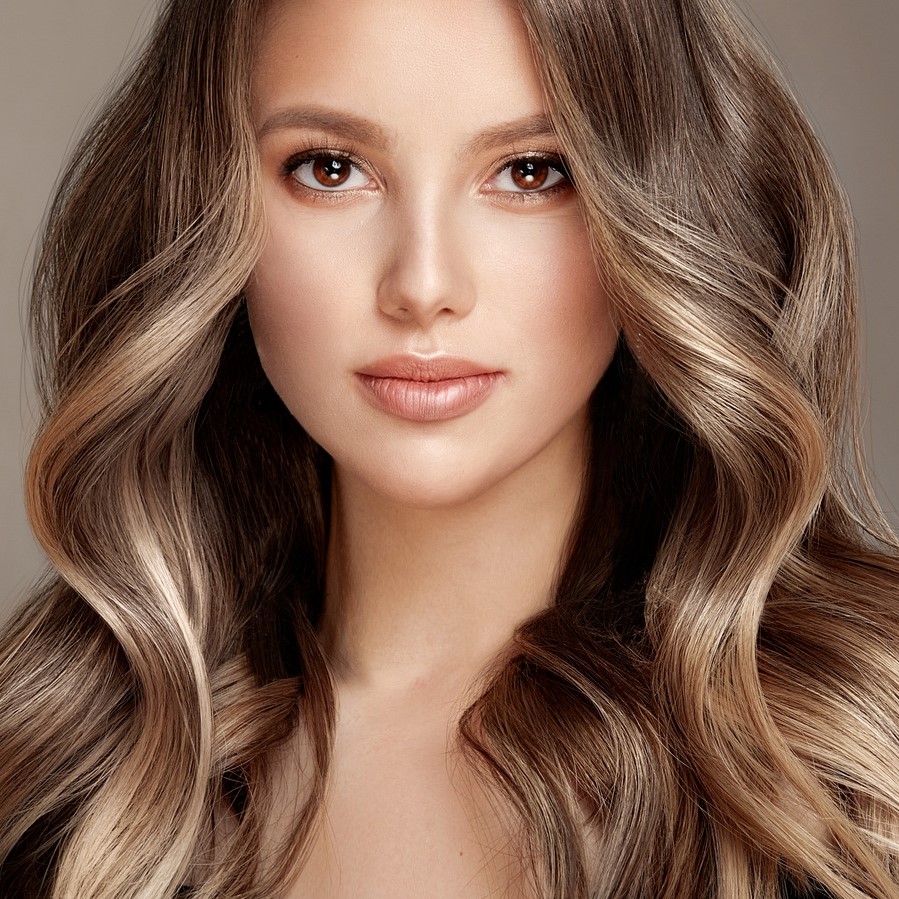
by Achieving beautiful, bouncy curls doesn’t always require a specialized curling iron. With the right technique and a reliable straightener, you can effortlessly transform your straight hair into stunning waves. Understanding how to curl hair with straightener opens up a world of versatile styling options, allowing you to create everything from loose beachy waves to tight, defined curls. This comprehensive guide will walk you through the steps, tips, and tricks to master this technique, ensuring you achieve salon-quality results at home.
Understanding the Basics of Curling with a Straightener
Before diving into the specifics, it’s essential to grasp the fundamental principles of using a straightener to curl your hair. Unlike traditional curling irons, straighteners offer more flexibility, enabling you to create various curl types depending on how you maneuver the tool.
Why Choose a Straightener for Curling?
Straighteners are multifunctional tools that can both straighten and curl hair, making them a valuable addition to any beauty routine. Here are some reasons why you might prefer using a straightener over a curling iron:
- Versatility: Straighteners allow you to create multiple styles, from straight hair to tight curls and loose waves.
- Efficiency: If you already own a straightener, you can save space and money by using it for multiple styling needs.
- Control: Straighteners provide greater control over the shape and size of the curls, enabling more precise styling.
Selecting the Right Straightener
To effectively how to curl hair with straightener, choosing the right tool is crucial. Consider the following factors when selecting a straightener:
- Plate Material: Ceramic and tourmaline plates are ideal for curling as they distribute heat evenly and reduce frizz.
- Plate Width: Narrow plates (around 1-inch) are perfect for creating tighter curls, while wider plates work best for loose waves.
- Temperature Control: Adjustable heat settings ensure you can tailor the temperature to your hair type, preventing damage and achieving optimal results.
- Additional Features: Look for features like automatic shut-off, swivel cords, and quick heat-up times for added convenience and safety.
Step-by-Step Guide: How to Curl Hair with Straightener
Mastering how to curl hair with straightener involves a series of precise steps. Follow this detailed guide to achieve flawless curls every time.
Step 1: Prepare Your Hair
Proper preparation is key to successful curling. Start by washing and conditioning your hair to ensure it’s clean and free from product buildup.
- Wash and Condition: Use a shampoo and conditioner suited to your hair type to maintain moisture and manageability.
- Towel Dry: Gently towel dry your hair to remove excess water, leaving it slightly damp.
- Apply Heat Protectant: To prevent heat damage, apply a heat protectant spray or serum evenly throughout your hair.
Step 2: Section Your Hair
Dividing your hair into manageable sections makes the curling process more efficient and ensures uniform results.
- Clips and Sections: Use hair clips to separate your hair into top and bottom sections. Further divide each section into smaller subsections for easier handling.
- Work Methodically: Start curling from the bottom sections and work your way up to the top, ensuring each strand is properly styled before moving on.
Step 3: Heat Up Your Straightener
Setting the right temperature is crucial. Adjust your straightener to a temperature suitable for your hair type:
- Fine or Thin Hair: Use a lower heat setting (around 300°F) to prevent damage.
- Medium Hair: A medium heat setting (around 350°F) is ideal.
- Thick or Coarse Hair: Opt for a higher heat setting (up to 400°F) to effectively curl your hair.
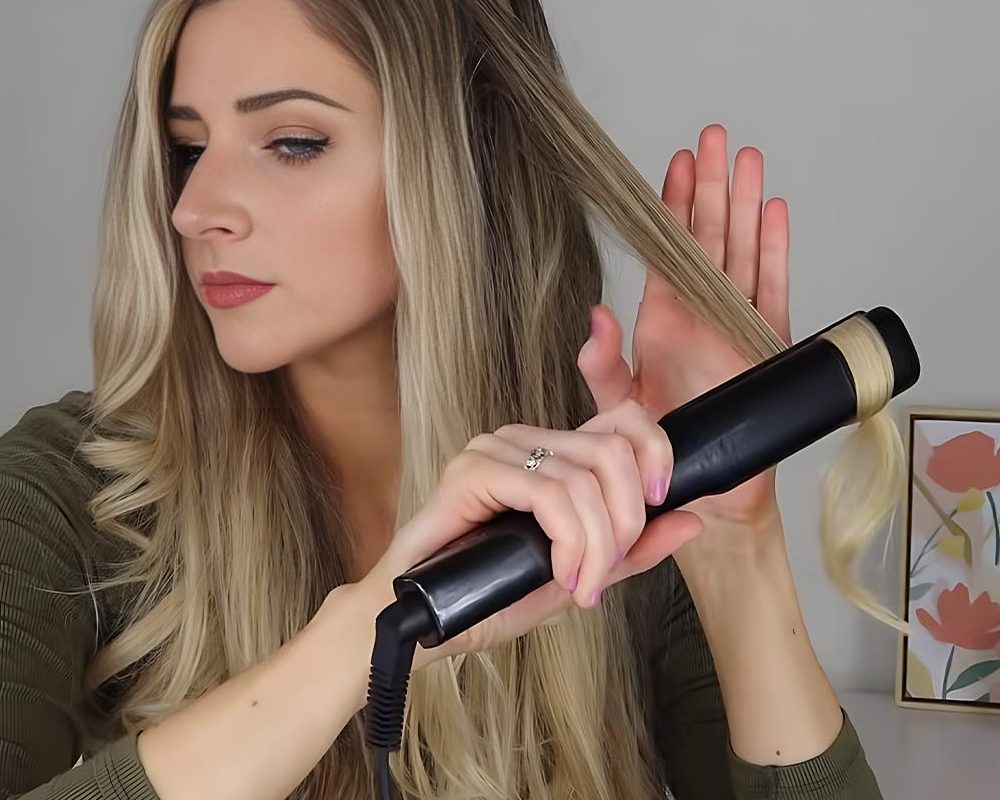
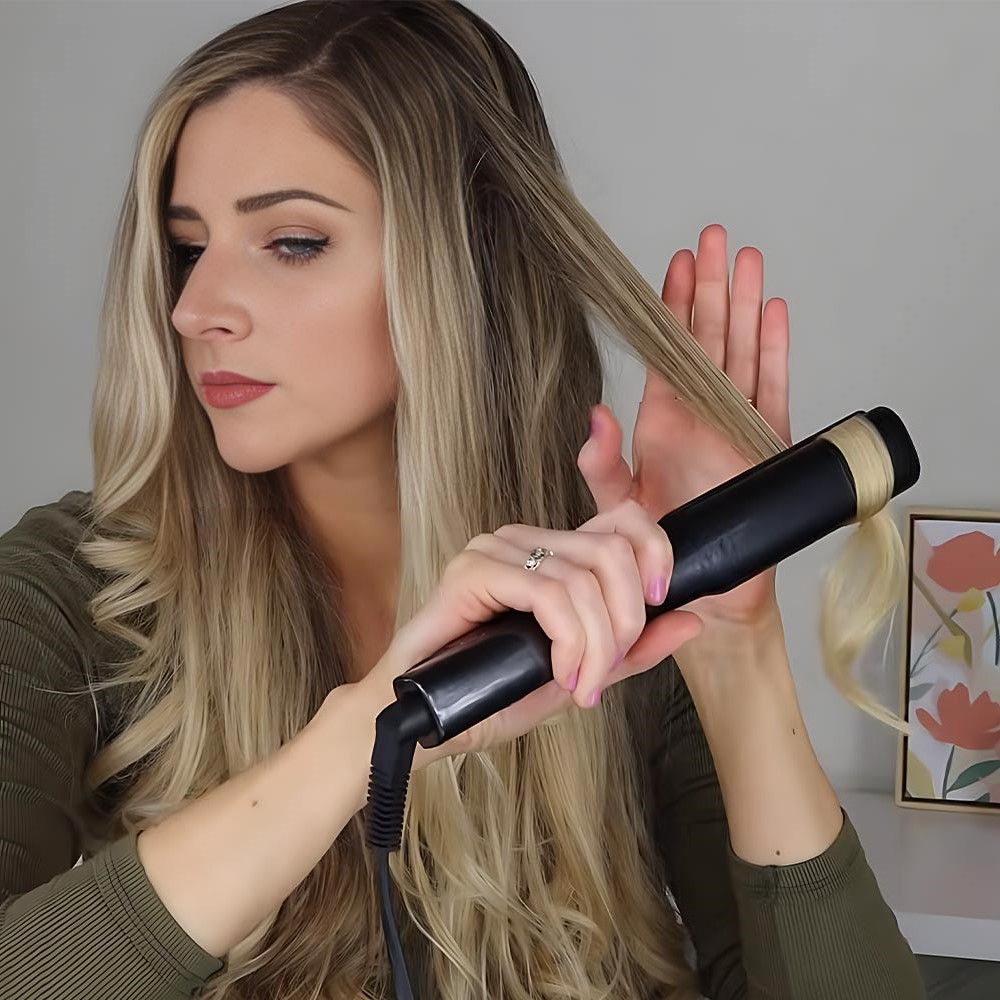
Step 4: Take a Small Section of Hair
For best results, take a thin strand of hair about 1-inch wide. Smaller sections tend to hold curls better and provide a more polished look.
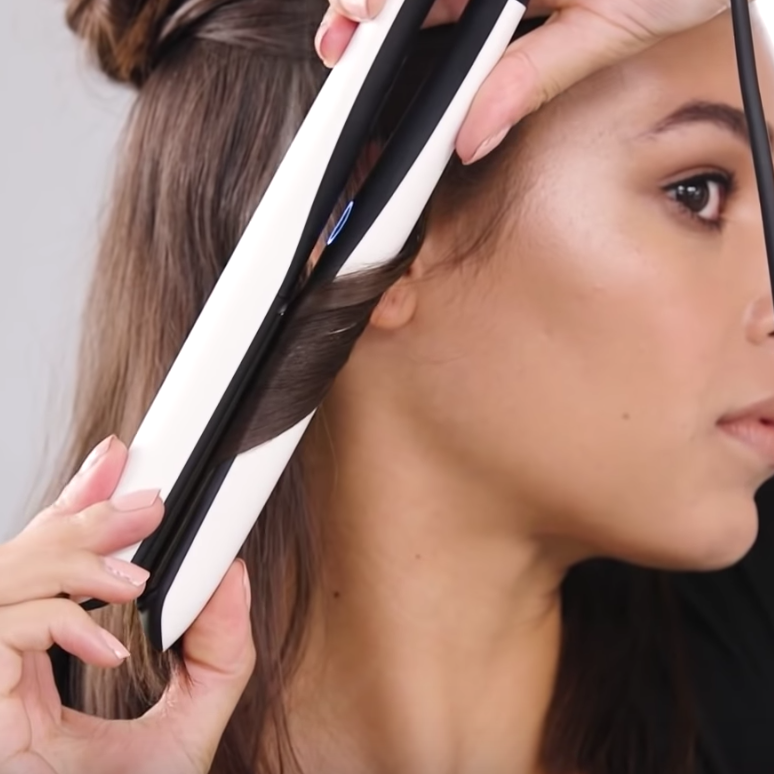
Step 5: Clamp the Straightener
Clamp the straightener near the roots of the hair section, but avoid pressing too tightly to prevent breakage.
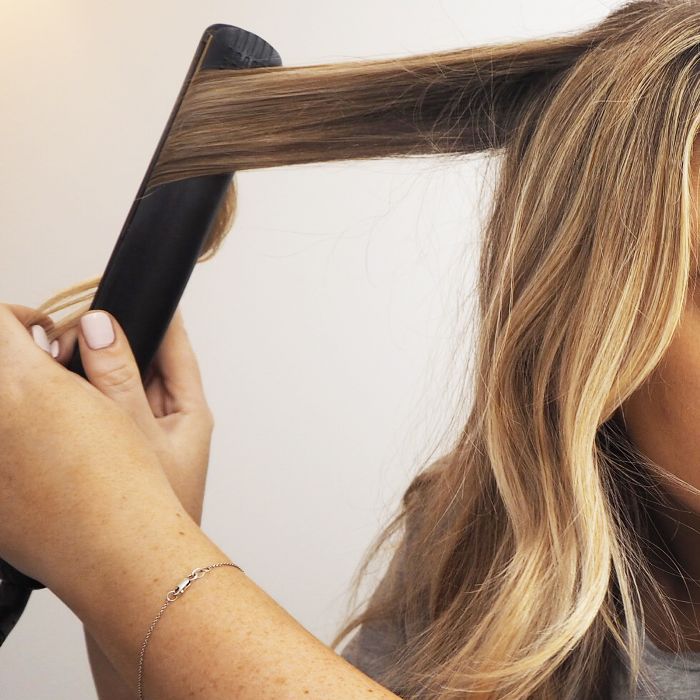
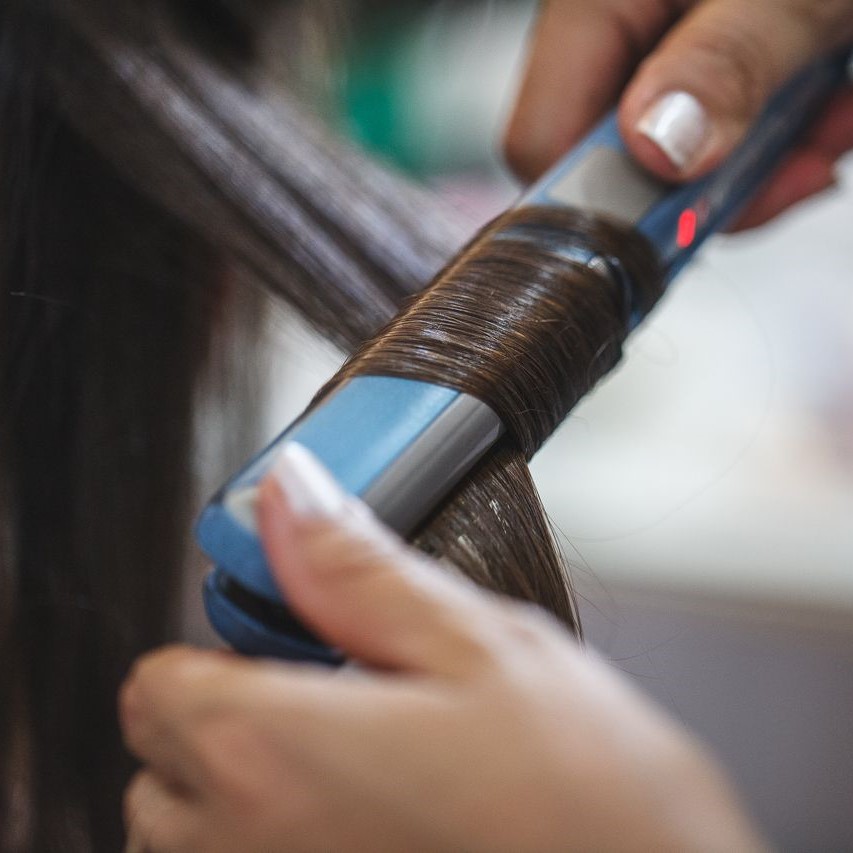
Step 6: Twist and Pull
This is the core step in how to curl hair with straightener:
- Twist the Straightener: Rotate the straightener away from your face, turning it about 180 degrees.
- Pull Through Slowly: While twisting, gently pull the straightener down the length of your hair to form a curl. The speed at which you pull will determine the curl’s tightness; slower pulls create tighter curls, while faster pulls yield looser waves.
Step 7: Release and Cool
Once you’ve pulled the straightener through, release the hair and let the curl cool in place. This helps set the curl and ensures it lasts longer.
Step 8: Repeat Until All Sections Are Curls
Continue the process section by section until your entire head is beautifully curled.
Advanced Techniques for Perfect Curls
Once you’ve mastered the basics, you can experiment with advanced techniques to enhance your curls.
Creating Volume with Root Curls
For added volume, focus on the roots:
- Section the Roots: Take small sections of hair near the crown.
- Curl Outwards: Twist the straightener away from your face to create an outward-facing curl, adding lift and volume.
Ombré and Highlight Curls
Enhance your curls by incorporating color techniques:
- Selective Curling: Curl specific sections of your hair to highlight your natural highlights or to complement an ombré effect.
- Soft Waves: Use larger sections and curl towards the ends for a soft, highlighted wave.
Tight Spiral Curls
For a more dramatic look, create tight spiral curls:
- Longer Twists: Twist the straightener multiple times as you pull through the hair to form spiral curls.
- Layered Curls: Alternate the direction of curls in different sections for a more dynamic and textured appearance.
Essential Tools and Products for Curling with a Straightener
Enhance your curling experience with the right tools and products.
Heat Protectants
Protect your hair from heat damage by using a good quality heat protectant:
- Sprays and Serums: Apply evenly to damp hair before styling.
- Benefits: Prevents breakage, reduces frizz, and maintains hair’s moisture.
Styling Products
Lock in your curls with the right styling products:
- Mousse or Foam: Adds volume and hold without weighing hair down.
- Curl Enhancers: Define and maintain curls throughout the day.
- Hairspray: Provides long-lasting hold and controls frizz.
High-Quality Straighteners
Invest in a reliable straightener for consistent results:
- Ceramic and Tourmaline Plates: Distribute heat evenly and reduce frizz.
- Adjustable Temperature Settings: Customize heat based on your hair type.
- Ergonomic Design: Ensures comfortable handling during styling.
Accessories
Enhance your curling routine with helpful accessories:
- Heat-Resistant Gloves: Protect your hands from heat while curling.
- Hair Clips and Sectioning Tools: Keep hair organized and manageable.
- Wide-Tooth Comb: Detangle hair before styling to ensure smooth curls.
Tips and Tricks for Perfect Curls Every Time
Achieving flawless curls with a straightener requires attention to detail and a few insider tips.
Use the Right Amount of Heat
Applying too much heat can damage your hair, while too little heat won’t effectively style it. Always adjust the temperature based on your hair type:
- Fine Hair: 300-325°F
- Medium Hair: 325-350°F
- Thick Hair: 350-400°F
Curl Away from Your Face
For a natural and flattering look, always curl your hair away from your face. This technique creates movement and opens up your face.
Allow Curls to Cool
Letting your curls cool before touching them helps set the shape, making your styles last longer and reducing the chances of them falling out too quickly.
Don’t Overload Your Straightener
Take small sections of hair at a time. Overloading the straightener with too much hair can result in uneven curls and increased heat exposure, leading to damage.
Alternate the Curl Direction
For a more natural and voluminous look, alternate the direction in which you curl each section. This prevents the hair from clumping and adds dimension to your style.
Finish with a Cool Shot
If your straightener has a cool shot feature, use it after curling to set the style and add shine.
Regular Maintenance of Your Straightener
Keep your straightener in top condition to ensure it performs effectively:
- Clean the Plates: Wipe down the plates after each use to remove any product buildup or hair remnants.
- Check for Damage: Regularly inspect the straightener for any signs of wear or damage and replace it if necessary.
- Store Properly: Keep your straightener in a safe, dry place to prevent accidents and extend its lifespan.
Common Mistakes to Avoid When Curling with a Straightener
Even with the best instructions, it’s easy to make mistakes that can affect your results. Avoid these common pitfalls to achieve perfect curls every time.
Skipping Heat Protectant
Neglecting to use a heat protectant can lead to significant hair damage, including dryness, breakage, and split ends. Always apply a heat protectant before styling.
Using the Wrong Temperature
Using a temperature that’s too high for your hair type can cause damage, while too low a temperature may result in ineffective curling. Adjust the heat settings appropriately.
Holding the Straightener in One Place Too Long
Pressing down with the straightener for too long can create unwanted creases and stress your hair. Swift, smooth movements yield better curls without damage.
Not Sectioning Hair Properly
Failing to section your hair thoroughly can result in uneven curls and increased styling time. Use hair clips to keep sections organized and manageable.
Rushing the Process
Taking your time ensures each section is properly curled and reduces the risk of mistakes. Allocate sufficient time for your grooming routine to achieve the best results.
Ignoring Hair Health
Regular use of heat tools can take a toll on your hair if you’re not mindful of its health. Incorporate deep conditioning treatments and minimize heat styling frequency to maintain healthy hair.
Enhancing Your Curls with Additional Styling Techniques
Take your how to curl hair with straightener skills to the next level by incorporating additional styling techniques.
Adding Texture with Sea Salt Spray
Sea salt spray can add texture and volume to your curls, creating a more relaxed, beachy look. Spray lightly on damp hair before curling to enhance the natural movement.
Incorporating Braids
Braiding your hair before curling can create natural-looking waves and add extra volume. After curling, gently undo the braids for soft, effortless waves.
Using Curling Fingers
For a more relaxed and natural appearance, use your fingers to shape the curls after pulling the straightener through. This technique helps break up uniform curls and adds a touch of softness.
Applying Shine Serum
After curling, apply a small amount of shine serum to add luster and smoothness to your curls. This helps reduce frizz and keeps your hair looking polished.
Caring for Your Curls: Maintenance and Longevity
Once you’ve achieved the perfect curls, it’s essential to maintain them to ensure they last throughout the day.
Refreshing Curls Overnight
Protect your curls overnight by loosely braiding your hair or using a silk scarf. This helps maintain the curl shape and reduces frizz.
Using a Light Hold Hairspray
A light hold hairspray can help set your curls without making them stiff or crunchy. Spray lightly to keep your curls in place while allowing for natural movement.
Avoiding Excessive Touching
Constantly touching or playing with your curls can cause them to lose shape and create frizz. Let your curls set and resist the urge to touch them frequently.
Re-Curling as Needed
For curls that lose their shape throughout the day, re-curling specific sections can help revive them. Target areas that need reinforcement and gently reshape the curls.
Deep Conditioning Treatments
Regular deep conditioning treatments restore moisture and strength to your hair, keeping your curls healthy and vibrant. Incorporate a weekly deep conditioner into your hair care routine.
 Conclusion
Learning how to curl hair with straightener is a valuable skill that enhances your styling repertoire and provides versatile options for creating beautiful curls and waves. By following the steps outlined in this guide, selecting the right tools, and incorporating essential tips and techniques, you can achieve salon-quality curls from the comfort of your home. Embrace the flexibility and efficiency of using a straightener for curling, and enjoy the confidence that comes with having beautifully styled hair tailored to your personal taste.
As you continue to practice and refine your technique, you’ll discover new ways to personalize your curls, experiment with different styles, and maintain the health and vitality of your hair. Whether you’re preparing for a special occasion or simply wanting to elevate your everyday look, mastering how to curl hair with straightener empowers you to create stunning, versatile hairstyles that showcase your unique beauty and style.