 by
by An electric shaver is a convenient tool for daily grooming, offering a swift and efficient shaving experience. However, like any device that comes into contact with your skin, it needs regular cleaning to maintain optimum performance and hygiene. Whether you’re new to electric shavers or looking for the best maintenance tips, this guide will show you how to clean an electric shaver properly. Read on to discover detailed steps and essential tips for keeping your electric shaver in top condition, ensuring it operates smoothly and lasts longer.
Setting Up Your Cleaning Space
Before you begin cleaning your electric shaver, it’s crucial to set up an appropriate space and gather the necessary tools.
- Work Area: Choose a clean, well-lit area with ample counter space. A bathroom sink is often ideal, providing access to water.
- Gathering Tools: You will need a small brush, mild soap, a bowl of warm water, and a soft cloth. Some shavers include a cleaning brush in the package.
- Powering Down: Before starting, make sure your shaver is turned off and unplugged if it’s a corded model.
- Manual Reference: Keep the shaver’s user manual handy, as it may contain specific cleaning instructions or warnings.
Setting up the right environment and tools ensures an efficient and safe cleaning process for your electric shaver.
Dismantling the Shaver
Properly dismantling your electric shaver is essential for a thorough cleaning. Different models might have slightly different methods, so refer to your user manual as needed.
- Removing the Head: Most electric shavers allow you to remove the shaving head. Press the release button or unscrew the head as per your model’s specification. Place the detached head on a clean surface.
- Accessing Blades and Foils: Gently lift or unscrew the blades and foils. Be careful, as these parts can be delicate and sharp. Lay them out separately.
- Brush Away Loose Hairs: Use the small cleaning brush to gently remove loose hairs from the detached parts. Pay special attention to the areas around the blades and foils.
- Inspect for Damage: While dismantling, inspect each component for signs of wear or damage. Replace any parts showing significant wear to maintain performance.
Dismantling the shaver correctly ensures that each component can be cleaned thoroughly, enhancing the device’s efficiency.
Cleaning with Water and Soap
Using water and mild soap is one of the most effective ways to clean your electric shaver, especially if it’s designed to be waterproof.
- Rinsing the Head: Rinse the shaving head under warm running water. If your shaver is waterproof, you can rinse the entire head assembly. Use your fingers or a brush to remove stubborn hairs.
- Soapy Solution: In a bowl of warm water, add a few drops of mild liquid soap. Swirl the head and blades through the soapy water to dislodge oils and debris.
- Cleaning Foils and Blades: Dip a soft cloth into the soapy water and gently wipe down the foils and blades. Avoid pressing too hard to prevent damage.
- Rinsing: Thoroughly rinse all parts under warm running water to remove soap residue. Make sure no soap is left on the components, as dried soap can affect performance.
Cleaning with soap and water effectively removes hair, oil, and debris, keeping your shaver hygienic and efficient.
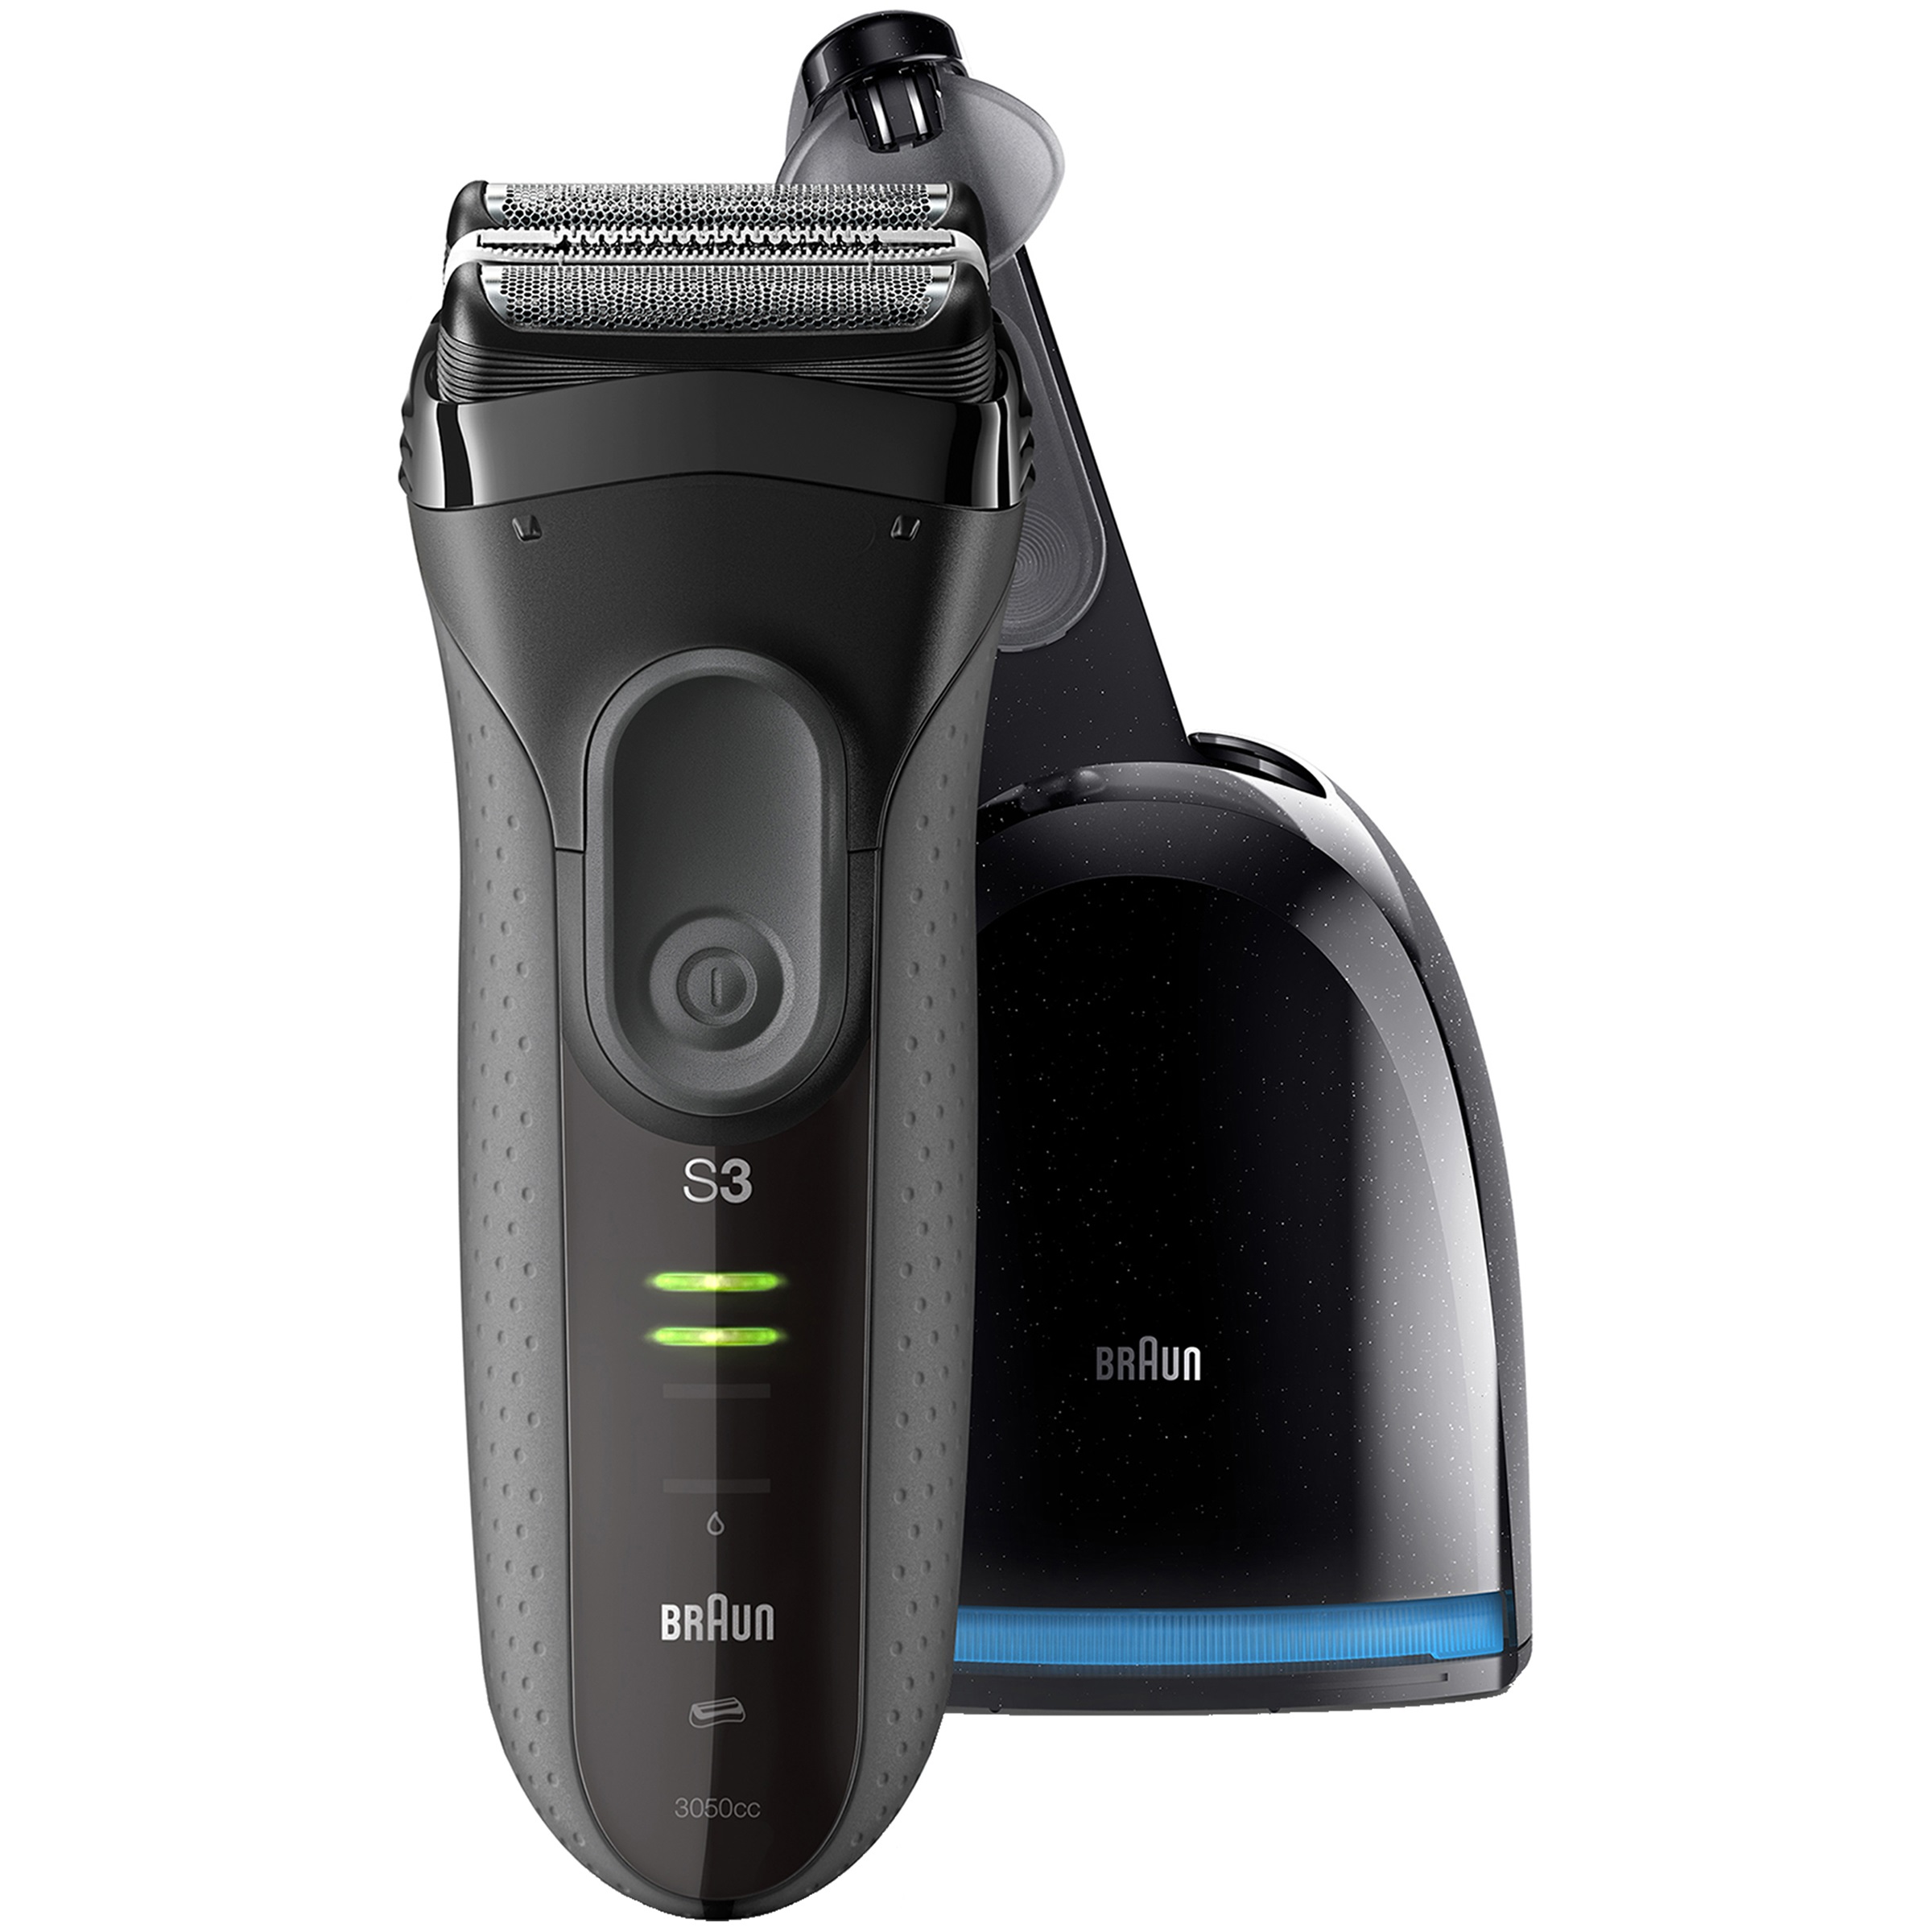
Using a Cleaning Station
Many high-end electric shavers come with a dedicated cleaning station that automates the cleaning process. Understanding how to use these stations can save time and effort.
- Preparing the Station: Fill the cleaning station with the recommended cleaning fluid or cartridge. Follow the manufacturer’s instructions for your specific model.
- Inserting the Shaver: Place the shaver head down into the cleaning station. Ensure it is securely positioned to make proper contact with the cleaning system.
- Starting the Cycle: Select the cleaning program as per the station’s controls. Most stations offer various cleaning modes, including quick clean and deep clean.
- Post-Cleaning: Once the cycle is complete, remove the shaver and allow it to air dry. Many stations have a drying function that minimizes moisture.
Using a cleaning station simplifies the maintenance routine and ensures a thorough, automated cleaning process.
Drying and Reassembling the Shaver
After cleaning, correctly drying and reassembling your shaver is crucial to prevent rust and ensure proper operation.
- Air Drying: Lay out all the cleaned components on a soft towel to air dry. Ensure they are completely dry before reassembling to avoid moisture-related damage.
- Pat Drying: Use a soft, lint-free towel to pat dry any parts that still appear damp. Pay special attention to the blades and foils, as these are most prone to rust.
- Reassembly: Once all parts are dry, carefully reassemble the shaver. Follow the reverse order of the disassembly process, ensuring each component is securely placed back.
- Final Check: Power on the shaver for a quick test to ensure everything is functioning correctly. Listen for any unusual noises that might indicate improper assembly.
Proper drying and careful reassembly maintain the shaver’s functionality and longevity.
Lubricating the Blades
Lubricating the blades is an often-overlooked but vital step in maintaining your electric shaver’s performance.
- Choosing the Right Lubricant: Use the manufacturer-recommended lubricant or a suitable light oil like clipper oil. Avoid heavy oils, as they can clog the blades.
- Applying Lubricant: After reassembling the shaver, apply a few drops of lubricant directly onto the blades and foils. Distribute the oil evenly by switching on the shaver for a few seconds.
- Wiping Excess: Use a soft cloth to wipe away any excess oil. Ensure the lubricant doesn’t drip into unintended areas, which could affect other components.
- Regular Maintenance: Lubricate the blades after each thorough cleaning and periodically between cleanings to ensure smooth operation and extend the blade’s life.

Utilizing Disinfectant Sprays
To maintain hygiene, especially for shavers that touch sensitive skin areas, using a disinfectant spray is a good practice.
- Choosing a Disinfectant: Select an alcohol-based disinfectant spray designed for grooming tools. These sprays effectively kill bacteria and prevent infection.
- Application: After cleaning and drying the shaver, lightly spray the disinfectant on the blades and foils. Do not over-saturate to avoid damage.
- Contact Time: Allow the disinfectant to sit for a few minutes to effectively kill any remaining bacteria or germs.
- Final Rinse: Some disinfectants require a final rinse. Check the product instructions and rinse if necessary, then let the shaver air dry.
Using a disinfectant spray ensures your shaver remains hygienic, reducing the risk of skin irritation and infections.
Cleaning the Charging Port
The charging port can accumulate dirt and grime over time, affecting the shaver’s ability to charge efficiently.
- Unplugging: Ensure the shaver is turned off and unplugged from any power source before cleaning the charging port.
- Using Compressed Air: Gently use a can of compressed air to blow out dust and debris from the charging port. Keep the can upright and use short bursts.
- Brush Cleaning: Use a small brush to remove any remaining debris. Be gentle to avoid damaging the port’s connectors.
- Final Check: Ensure the port is clean and free of debris before plugging the shaver back in to charge. Test the charging to confirm proper function.
Regular cleaning of the charging port ensures efficient power connectivity and prolongs the battery life.
Storing Your Shaver
Proper storage is essential to keep your shaver in good condition between uses.
- Dry Environment: Store the shaver in a dry, cool place to prevent rust and moisture damage. Avoid leaving it in a humid bathroom.
- Protective Case: Use a protective case or pouch to keep the shaver safe from dust and accidental drops. Most shavers come with a storage case.
- Avoid Direct Sunlight: Keep the shaver away from direct sunlight, which can degrade plastic components and affect battery life.
- Travel Considerations: If traveling, ensure the shaver is securely packed. Remove the battery if possible to prevent accidental activation during transit.
Storing the shaver properly prevents damage and ensures it’s ready for use whenever needed.
 Troubleshooting Common Cleaning Issues
Despite regular cleaning, you may encounter issues with your electric shaver. Knowing how to troubleshoot these can save time and hassle.
- Poor Performance: If the shaver is not performing well after cleaning, check for any missed areas in the cleaning process. Ensure the blades and foils are securely in place and properly lubricated.
- Unusual Noises: Unusual noises might indicate misalignment or debris in the motor. Re-dismantle and check all parts, clean again if necessary, and ensure correct reassembly.
- Charging Issues: If the shaver fails to charge, inspect the charging port for debris or damage. Clean the port thoroughly and test with a different outlet or charger.
- Battery Life: If battery life seems reduced, it might be a sign of wear. Ensure the battery is not overcharged and see if a replacement is needed as per the manufacturer’s recommendations.
Addressing common issues promptly ensures that your shaver continues to function effectively and efficiently.
Benefits of Regular Cleaning
Understanding the benefits of regular cleaning can motivate you to maintain your electric shaver diligently.
- Enhanced Performance: Regular cleaning ensures the shaver performs at its best, providing a closer and more comfortable shave.
- Longevity: Keeping the shaver clean and well-lubricated extends the life of the blades, foils, and the entire device, saving money on replacements.
- Hygiene: Regular cleaning prevents the buildup of bacteria and germs, reducing the risk of skin irritation and infections.
- Efficiency: A well-maintained shaver operates more efficiently, leading to a better shaving experience and reduced wear on the motor and batteries.
Recognizing these benefits underlines the importance of regular cleaning and helps maintain the shaver’s optimal condition.
Conclusion
Learning how to clean an electric shaver properly involves understanding the detailed steps of dismantling, cleaning, drying, and reassembling the device. Regular maintenance, including lubrication and disinfection, ensures optimal performance and hygiene. Proper storage, paired with troubleshooting common issues, keeps the shaver functional and efficient. By following this comprehensive guide, you can ensure your electric shaver remains a reliable tool in your grooming kit, providing excellent performance and longevity. Happy shaving!